Published: January 8, 2021 Author: JasonDarkX2 Category: Gaming,Tutorials
Last Updated: February 5, 2021
Got a Nvidia Shield TV Pro but trying to figure out how to get Stadia on it. Since it isn’t officially on the Play store yet? It’s time to walk through the wonderful method of sideload Android apps on your Nvidia Shield TV Pro or any Android TV boxes. Since sideloading apps is pretty much a given technique every Android user should learn.
So here’s what you’ll need:
A Stadia account is required, if you don’t have one, simply follow this tutorial:
Stadia sign up bypass Pro trial activation
| Hardware: |
Apps: |
- Any Android phone/tablet. That has Stadia Support.
- Nvidia Shield TV Pro, or any Android TV boxes
- Any Bluetooth Controller would suffice.
|
|
Step 1- Installing the necessary Apps
The first order of business is installing Apps on your Android devices. On the Google Play store simply search for the following:
| On Android Phone/Tablet: |
On Nvidia Shield TV Pro: |
|
|
Step 2- Export Stadia app to APK

Once you have everything installed. We’ll now be converting the official Stadia app, it into an APK. Head over to your Android phone/tablet.
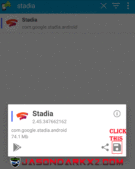
- Open APK Export.
- Search for Stadia
- Select it and click the save icon (looks like a floppy disk).
After successful conversion. The APK file will be placed in an "apk" directory of your device internal storage.
Step 3-Transfer Stadia APK to Nvidia shield

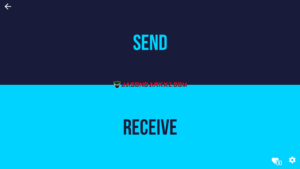
With your Android device in hand while connected to the same network as your Nvidia Shield TV Pro. Open up the Send files to TV app both on both devices.
- While on Nvidia Shield TV Pro select "Receive".
- Whereas on your Android Device Select "Send".
It will prompt you to select what to send. Simply select the Stadia APK we created in the prior step.
A transfer progress screen will show on your Nvidia Shield TV Pro once a transfer is initialed.
Step 4- Installing the Stadia APK
Once Successfully, It's time to install the APK using File Commander app.
The Stadia APK file will be located in internal Storage within the Downloads folder.

If it's your first time installing anAPK file on your Nvidia Shield TV Pro.
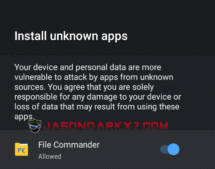
You're going have to allow unknown sources.
- By simply selecting Settings when prompted.
- Which would take to the "Install Unknown app" settings panel.
- Choose File Commander, and set it to "Allowed"
Now when you go to install the Stadia APK with file commander it will not prompt asking if you trust this unknown source.
Simply go through the install process. If successful, Yay! You've successfully sideloaded your first app onto your Nvidia Shield TV Pro.
Well, that pretty much covers the installation process.
Step 5 – Connecting a controller
While there are USB ports on the back of your Nvidia shield, Only Bluetooth controllers are supported. Therefore, to pair a Blue tooth controller simply head over:
- Settings
- Remote & Accessories
- Add Bluetooth Accessories
- Begin the paring process for your controller.
The benefits of pairing a Bluetooth controller to the Shield TV Pro. Opposed to using a Stadia controller is that a Bluetooth controller paired to the Shield TV Pro allows you to control/navigate the shield TV Pro UI as well. Whereas the Stadia controller connected through to the wifi only allows you to only control the game that’s running on your account. Requiring you to use the shield TV remote to get to the Stadia app to run the game before able using the Stadia Controller. That's it, once you've chosen your preferred controller, it's game on!
Tags:
Android,
Android TV,
Gaming,
Nvidia Shield TV Pro,
Stadia,
tech tutorial